Showing posts with label bushcraft. Show all posts

01 March 2010

Balm of Gilead Salve

An anti-inflammatory, antibiotic and pain relieving salve made from cottonwood or poplar buds


The buds of a number of varieties of cottonwood and poplar trees (Populus nigra, Populus balsamifera, Populus augustafolia and others) contain a sticky orange resin that has been used for centuries to make a soothing, healing salve commonly known as “Balm of Gilead.” This salve has anti-inflammatory, antibiotic/antiseptic and pain relieving qualities, and has been effectively used to treat abrasions, minor burns, frostbite and to ease the pain of sore muscles and joints. It is also (sometimes known as Black Salve) a traditional skin cancer remedy.

The months between December and March are, depending on your location, best for harvesting the buds.


The buds must be collected, of course, before the leaves emerge, and if you wait until too late in the spring, you may end up with more of the sticky orange sap on your fingers than not! Cold days are best for collecting the buds; anything below freezing will do. Best of all is to find a fallen branch or two, as they will be easier to reach and will not damage the tree, as taking too many buds from a living branch can do. If you cannot find a fallen branch, go ahead and harvest from the living branches you can reach, but take selectively, a few here, a few there, so as not to damage the tree by preventing entire branches from leafing out.


Once you have collected the buds, you can either use them right away, or they can be dried or frozen for later use. If you choose to dry them, make sure they are spread out in a single layer on a board or cookie sheet, as they will tend to mold pretty quickly if left in heaps and allowed to retain moisture. Freezing really is the best way to preserve them, if you’re not ready to make your salve right away.

There are several ways to extract the resin from the buds for making Balm of Gilead salve. One is done by slowly simmering the buds in hot oil to release their resin, and the second, which takes longer but yields a slightly more potent finished product, involves placing the buds in a crock or jar, and covering them with oil, leaving them to “steep” for a period of several weeks to a year. The resin can also be extracted by soaking the buds in alcohol for several weeks, the results combined with oil and simmered to drive off the alcohol, but I have found the oil itself to be sufficient for extraction.


Simmering method:

Cover buds with oil--olive is perhaps the best, but coconut and others can be used--and simmer gently (do not boil!) to release the sticky orange resin. Cool and strain.


Gently simmering cottonwood buds in olive oil for several hours. You can see the yellow-orange resin beginning to ooze out of the buds as the oil heats.


Steeping method:

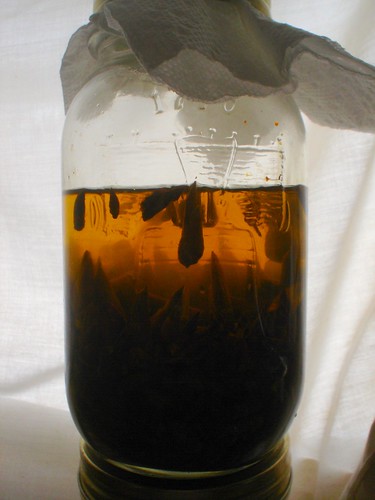
Fill a mason jar or crock halfway with buds, cover with olive oil and set aside. A sunny windowsill or warm spot in the kitchen speeds up the process. Leave in place for at least two weeks, but there is really no such thing as leaving it too long.


Making the salve:


Ingredients: Bee's wax, grapefruit seed extract, cottonwood bud oil


I find that a ratio of 1/1 by volume of oil and wax shavings generally works well.


Equal measures (approximately) of wax shavings and oil, by volume


Heat the oil just to lukewarm, and add the wax. Do not boil. Stir with a wooden stick or, if you must use metal, with stainless steel.


Set out your containers. Almost anything will work, from "jelly" sized mason jars to Altoids tins to these salvaged air gun pellet containers I'm using (on left.)


Before pouring into the containers, put a bit of the salve on a spoon and refrigerate it for a few minutes (or just set it out on the counter, if your house is as cool as mine…this sample hardened shortly after contacting the spoon) to make sure that the finished texture will be alright. It is much easier to add either wax or oil to the mix now, than it will be to later dig the salve out of containers and modify it.


I added two drops of grapefruit seed extract to this batch, a preservative and to increase the antiseptic/antibacterial value of the salve. This step is optional.


Pouring into the tins...


Freshly poured...a wonderful yellow-orange color:


Checking the texture again...just right!


Solidifying takes only minutes in a cool house, longer if the weather is warmer:


All done and ready to use. A very versatile salve that can be used in place of antibiotic ointment on minor cuts, abrasions and burn, helps treat frostbite (have tried that...) and works wonders on dry, chapped hands and cracked fingers and toes.


This is the simplest version. Some possible additions could include lanolin, vitamin E oil or coconut oil, all of which slightly change the properties and texture of the salve. Experiment with small batches, and learn what works best for you!

19 September 2009

Wild foood: Cattail roots


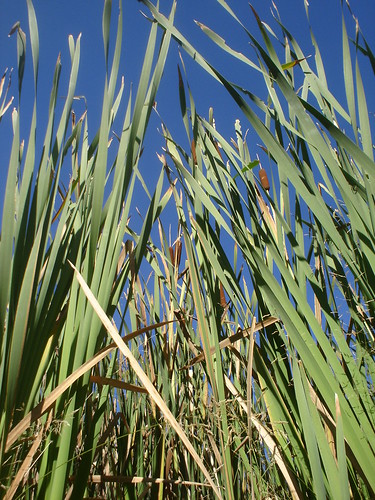
Every part of the cattail plant (Typha latifolia or angustifolia) has its use, depending on the season, but today we will talk about the roots.

I use the roots in a couple of ways--boiling and scraping for “mashed potatoes,” and soaking to dissolve the starch for use as flour.

September is perhaps not the ideal time to collect these roots, as they will be starchier and fuller later in the fall and into the winter with stored energy that the new plants will use to begin growing in the spring. But, too much later and the cattail swamps up here will not only be frozen, but covered in several feet of snow! The roots provide enough starch to be worthwhile, year-round, and in many areas of the country can be harvested throughout the winter.

Cattail roots grow horizontally beneath the water and mud in areas of slowly flowing or still water, and can be found by digging down with your hand or with a sharp stick near the plants. Once you find a root, most of them no deeper than six inches beneath the mud, begin loosening and pulling it until you feel it coming free. Often you can free one to two foot sections, sometimes longer. Despite being a messy, muddy project, the root harvest is not especially difficult or labor intensive, especially if you have found cattail patch with a good amount of standing water in it, as this will keep the muddy soil much looser and easier to free the roots from.


Even at this time of year, you will find a few tender white buds sprouting from the roots, and they make for a great snack while you work. No fibers in these, and they taste wonderful, like a very mild, starchy celery!


The roots will look mucky and black on the outside, but will be clean and starchy, once you cut or break them open.


Washed roots, being kept fresh in the water as I work


The roots between small, newly emerged shoots are often the plumpest and easiest to pull, but all are good. You will often find, by feel, one root crisscrossing atop another, and it always pays to feel around in the mud beneath each root you pull, to see if there is another.


All done for the day! Approximately fifteen pounds of roots, collected in just under an hour of pulling.


Wear old clothes and boots that you don’t mind getting muddy when pulling cattail roots, as you will often end up submerged in thick black muck up past your ankles, and with mud splashed up to your elbows. Great fun, though slightly less so when temperatures start getting down near freezing!

Wild food: Cattail roots, part two

Cattail shoots can be eaten raw, as can slices out of younger, less fibrous roots, though the root starch becomes more fully digestible after cooking.


Roots and shoots


Roots, all white and starchy and ready to boil


Boiled and split root, fibers scraped to remove the starch for eating. This starch has a taste and consistency very much like mashed potatoes, only “smoother,” and is equally filling!


It is impossible to salvage all of the starch by scraping like this, so I will save the scraped roots to process for making flour.

In part two, we will look at one way to make cattail flour, which contains gluten and can be used for baking, from the root starch.

Cattails grow in almost all areas of the country, from the sub alpine wilderness to the lowland suburbs, and can provide large quantities of food and other useful materials.


How have you used cattail roots or other parts?

Do you have any favorite methods of harvesting and/or preparing them?

Tell us about it!

14 September 2009

"Smokeless" fire: Dakota fire hole for efficient cooking and minimal smoke signature


I put "smokeless" in quotes because all wood fires produce some smoke. You can, however, greatly minimize and even very nearly eliminate your fire's smoke signature, with some effort.

One good way to do this is by using a Dakota fire hole. There are many variations on this method, but I'll demonstrate here the one I like best. You will need to dig a hole that is just over a foot deep, and no wider than that in diameter. The pit can be widened at the bottom to allow for longer pieces of wood. Then dig a small tunnel beginning a foot or so from the main pit and angling down to the bottom of it. This will allow additional air to be drawn through and help the fire to burn hotter and more efficiently, producing less smoke.

If you can, put the air tunnel on the side of the pit from which the prevailing winds in the area come, as this will help to fan the fire. Even this is not possible because of terrain limitations (as it was not for this demonstration) the setup should work quite well.

For your fire, start with very dry wood, preferably long-dead branches, still attached to the tree, which have been protected from moisture by the boughs above them. Remove all bark, as most barks do not burn completely and tend to smoke, and split your kindling very finely. I put three rocks down in the pit to build the fire on top of, so they can heat for later use (cooking or keeping in pockets, etc, for warmth) after fire is out.


All set up and ready to strike. This is split aspen wood from a standing dead tree, along with a small amount of juniper. I added a bit of milkweed down, surrounded by a wad of shredded juniper bark, to catch the spark. It is difficult to see in this photo, but there is a shallow trench in the bottom of the firepit (that the rocks are in) which lines up with the air tunnel. This both helps to draw air through, and allows you to place wood flat on the bottom of the pit, while still allowing air under it.

The hole is approximately twelve inches in diameter, widened out around the bottom to accept larger pieces of wood. By keeping it small at the top, you maximize efficiency and also make it easier to quickly cover the hole with a flat rock, if you have a sudden need to eliminate the fire and reduce your heat signature...


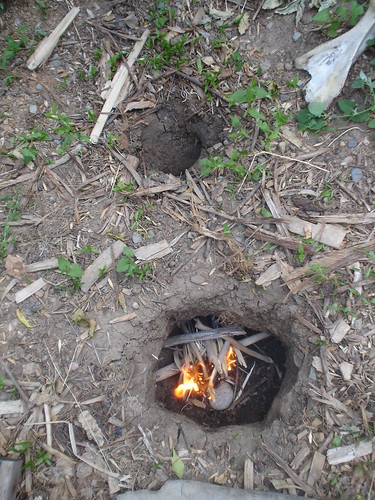
Fire took on the first strike, using a firesteel and length of old dulled hacksaw blade. This is the most smoke it ever produced, and that only for a moment, until it began drawing air through the tunnel.


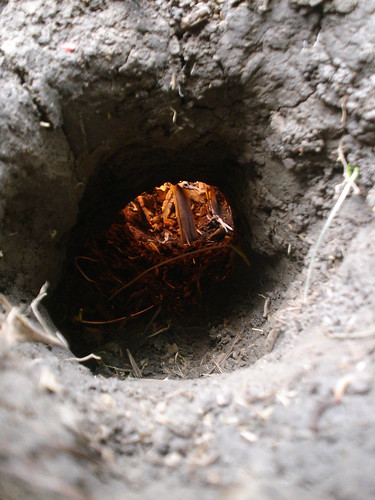
Looking in through air tunnel:

13 September 2009

Dakota fire hole, part two

Firehole and tunnel. I dug the hole with that deer shoulder bone and a sharpened juniper stick, for the tunnel.


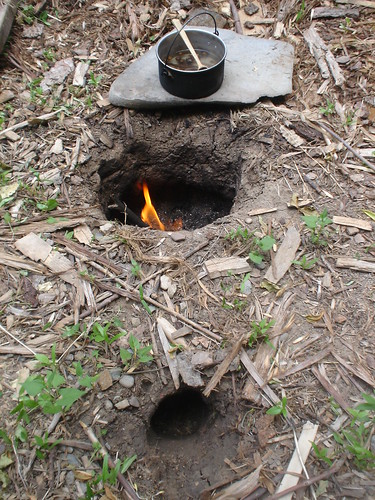
Starting the water heating. The firehole is a very efficient and quick way to bring water to a boil for purification, and makes a great cooking "stove," also! By angling firewood so part of it ends up in the tunnel, you can use longer pieces than you would otherwise be able, in this small 12 inch diameter hole.


Slide the rock partway over the pit to help keep the heat in and boil your water more quickly. Also provides a cooking/heating surface, if you need it. Just after this, I added some spring beauty and waterleaf roots that I had recently dug in a nearby alpine meadow.


Boiling away! I boiled my little "potatoes" for about ten minutes.


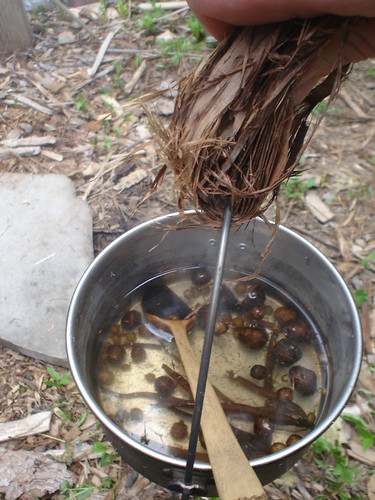
Improvised juniper-bark pot lifter...


All done, and still no smoke!

Fire is intentionally kept very small at all times. This should help minimize the amount of light that escapes, at night.


Ready to eat! Just after this I slid the large rock over the hole, and a smaller one over the tunnel opening, to cut off the air and let the fire die out with minimal smoke. If you get a tight seal between the ground/rock, no smoke escapes. If you have not been able to find a rock of just the right size, keep a little pile of dirt and small rocks handy to quickly toss over and close the gaps, sealing in the smoke of the dying fire.


Spring beauty corms--just like mashed potatoes, in both taste and texture. I eat skins and all. Very good! The waterleaf roots are not bad, either--nearly tasteless, but starchy and filling.


You can of course keep the fire going while you eat if it's cold weather, but if the idea is to quickly cook up a hot meal or purify some water with minimal smoke and heat signature, you'll want to put it out as soon as possible. In that case, keeping your pot on the rock while you eat helps keep your food warm, and you can always sit on the rock afterwards (check to make sure it's not too hot!) for warmth.

And don't forget those three rocks that are down in the bottom under the ashes, very hot by now. They can be fished out and used to help keep you warm, or even used for additional cooking (dropped into water to heat it,) maximizing the use you get out of this one small, quick fire.