19 September 2009

Wild foood: Cattail roots


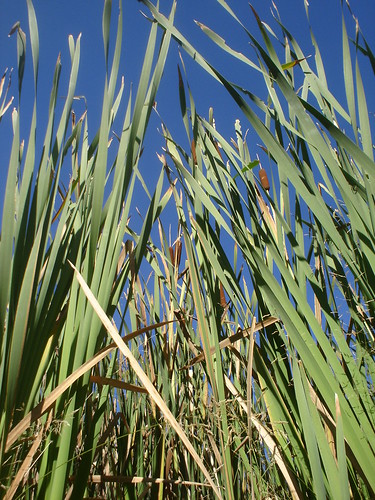
Every part of the cattail plant (Typha latifolia or angustifolia) has its use, depending on the season, but today we will talk about the roots.

I use the roots in a couple of ways--boiling and scraping for “mashed potatoes,” and soaking to dissolve the starch for use as flour.

September is perhaps not the ideal time to collect these roots, as they will be starchier and fuller later in the fall and into the winter with stored energy that the new plants will use to begin growing in the spring. But, too much later and the cattail swamps up here will not only be frozen, but covered in several feet of snow! The roots provide enough starch to be worthwhile, year-round, and in many areas of the country can be harvested throughout the winter.

Cattail roots grow horizontally beneath the water and mud in areas of slowly flowing or still water, and can be found by digging down with your hand or with a sharp stick near the plants. Once you find a root, most of them no deeper than six inches beneath the mud, begin loosening and pulling it until you feel it coming free. Often you can free one to two foot sections, sometimes longer. Despite being a messy, muddy project, the root harvest is not especially difficult or labor intensive, especially if you have found cattail patch with a good amount of standing water in it, as this will keep the muddy soil much looser and easier to free the roots from.


Even at this time of year, you will find a few tender white buds sprouting from the roots, and they make for a great snack while you work. No fibers in these, and they taste wonderful, like a very mild, starchy celery!


The roots will look mucky and black on the outside, but will be clean and starchy, once you cut or break them open.


Washed roots, being kept fresh in the water as I work


The roots between small, newly emerged shoots are often the plumpest and easiest to pull, but all are good. You will often find, by feel, one root crisscrossing atop another, and it always pays to feel around in the mud beneath each root you pull, to see if there is another.


All done for the day! Approximately fifteen pounds of roots, collected in just under an hour of pulling.


Wear old clothes and boots that you don’t mind getting muddy when pulling cattail roots, as you will often end up submerged in thick black muck up past your ankles, and with mud splashed up to your elbows. Great fun, though slightly less so when temperatures start getting down near freezing!

Wild food: Cattail roots, part two

Cattail shoots can be eaten raw, as can slices out of younger, less fibrous roots, though the root starch becomes more fully digestible after cooking.


Roots and shoots


Roots, all white and starchy and ready to boil


Boiled and split root, fibers scraped to remove the starch for eating. This starch has a taste and consistency very much like mashed potatoes, only “smoother,” and is equally filling!


It is impossible to salvage all of the starch by scraping like this, so I will save the scraped roots to process for making flour.

In part two, we will look at one way to make cattail flour, which contains gluten and can be used for baking, from the root starch.

Cattails grow in almost all areas of the country, from the sub alpine wilderness to the lowland suburbs, and can provide large quantities of food and other useful materials.


How have you used cattail roots or other parts?

Do you have any favorite methods of harvesting and/or preparing them?

Tell us about it!

Cattail roots & eggs


Now for some cattail root cooking. The fresh, sliced roots are very good when you fry them like potatoes! They get brown and crispy on the outsides just like potatoes when pan fried, and taste very similar, too. Just a slightly fibrous version of fried potatoes! A fine breakfast.


16 September 2009

Spring bounty in the high country

This past May, with the the snow disappearing quickly from the high country, I spent some time harvesting two plants that provided a major supplement to the largely meat diets of some of the tribes that lived in the Central and Northern Rockies.

Spring beauty and avalanche lily are two starchy-rooted plants that were collected in great quantities in the past.

Spring beauty (Claytonia virginica) is a relative of the also-edible purslane, and is widely distributed throughout the continental US, appearing in the mountains of Colorado, on Oklahoma prairies, and in various places along the East Coast, to name a few areas of its range. All parts of the plant are edible and tasty, the succulent leaves and stems providing a tasty snack when hiking, but the most valuable food source coming from their enlarged, starchy corms that resemble new potatoes in appearance, flavor and nutrition. They can be eaten raw, but are best boiled first for a few minutes.


The roots are best dug in the spring shortly after the plants have emerged, as at lower elevations they sprout, bloom and die back before the heat of summer really sets in, leaving them difficult to locate later in the year. Up high, the leaves sometimes persist through the summer.

Several of the mountain tribes would make annual expeditions to high meadows where the women and children would spend a week or more digging and drying these roots, each ending up with a good twenty or thirty pounds of the roots! (Traditional Plant Foods of Canadian Indigenous Peoples, Harriet V. Kuhnlein, p. 227)

Avalanche lilies (Erythronium grandiflorum) have large, starchy roots that were harvested in great quantity by the Blackfoot, Flathead and other tribes, and slowly roasted in pits to convert their poorly digestible sugars (mostly inulin) to fructose, before drying for the winter. These dried roots, often eaten cooked up into a soup with dried serviceberries, deer fat and spring beauty corms, were an important winter food source, as well as a valuable trade item. Very often, these two plants grow side by side in the alpine meadows around here.


This spring I went up to an area of high meadows and open aspen forests from which the snow had melted off only a week or two prior, and found the ground carpeted with the yellow blooms of the lilies and dotted with spring beauty blooms, acre after acre! I spent some time digging the roots of both plants.


Lily roots, stems, leaves and blossom
An old elk rib, found on site, turned out to be a nearly ideal digging tool.


Spring beauty corms--just like potatoes…

Spring bounty, part two

In the same area where I dug the spring beauty and avalanche lily corms, I found quite a bit of waterleaf (Hydrophyllum capitatum) which while not as abundant as the other two, also has an edible, starchy easily harvested root. Crunchy and juicy and not at all unpleasant raw, the roots are more easily digested when cooked, so should be boiled if possible.


(waterleaf roots with lily blooms in background)


The result of a few minutes of digging!


All three species, growing together

14 September 2009

"Smokeless" fire: Dakota fire hole for efficient cooking and minimal smoke signature


I put "smokeless" in quotes because all wood fires produce some smoke. You can, however, greatly minimize and even very nearly eliminate your fire's smoke signature, with some effort.

One good way to do this is by using a Dakota fire hole. There are many variations on this method, but I'll demonstrate here the one I like best. You will need to dig a hole that is just over a foot deep, and no wider than that in diameter. The pit can be widened at the bottom to allow for longer pieces of wood. Then dig a small tunnel beginning a foot or so from the main pit and angling down to the bottom of it. This will allow additional air to be drawn through and help the fire to burn hotter and more efficiently, producing less smoke.

If you can, put the air tunnel on the side of the pit from which the prevailing winds in the area come, as this will help to fan the fire. Even this is not possible because of terrain limitations (as it was not for this demonstration) the setup should work quite well.

For your fire, start with very dry wood, preferably long-dead branches, still attached to the tree, which have been protected from moisture by the boughs above them. Remove all bark, as most barks do not burn completely and tend to smoke, and split your kindling very finely. I put three rocks down in the pit to build the fire on top of, so they can heat for later use (cooking or keeping in pockets, etc, for warmth) after fire is out.


All set up and ready to strike. This is split aspen wood from a standing dead tree, along with a small amount of juniper. I added a bit of milkweed down, surrounded by a wad of shredded juniper bark, to catch the spark. It is difficult to see in this photo, but there is a shallow trench in the bottom of the firepit (that the rocks are in) which lines up with the air tunnel. This both helps to draw air through, and allows you to place wood flat on the bottom of the pit, while still allowing air under it.

The hole is approximately twelve inches in diameter, widened out around the bottom to accept larger pieces of wood. By keeping it small at the top, you maximize efficiency and also make it easier to quickly cover the hole with a flat rock, if you have a sudden need to eliminate the fire and reduce your heat signature...


Fire took on the first strike, using a firesteel and length of old dulled hacksaw blade. This is the most smoke it ever produced, and that only for a moment, until it began drawing air through the tunnel.


Looking in through air tunnel:

13 September 2009

Dakota fire hole, part two

Firehole and tunnel. I dug the hole with that deer shoulder bone and a sharpened juniper stick, for the tunnel.


Starting the water heating. The firehole is a very efficient and quick way to bring water to a boil for purification, and makes a great cooking "stove," also! By angling firewood so part of it ends up in the tunnel, you can use longer pieces than you would otherwise be able, in this small 12 inch diameter hole.


Slide the rock partway over the pit to help keep the heat in and boil your water more quickly. Also provides a cooking/heating surface, if you need it. Just after this, I added some spring beauty and waterleaf roots that I had recently dug in a nearby alpine meadow.


Boiling away! I boiled my little "potatoes" for about ten minutes.


Improvised juniper-bark pot lifter...


All done, and still no smoke!

Fire is intentionally kept very small at all times. This should help minimize the amount of light that escapes, at night.


Ready to eat! Just after this I slid the large rock over the hole, and a smaller one over the tunnel opening, to cut off the air and let the fire die out with minimal smoke. If you get a tight seal between the ground/rock, no smoke escapes. If you have not been able to find a rock of just the right size, keep a little pile of dirt and small rocks handy to quickly toss over and close the gaps, sealing in the smoke of the dying fire.


Spring beauty corms--just like mashed potatoes, in both taste and texture. I eat skins and all. Very good! The waterleaf roots are not bad, either--nearly tasteless, but starchy and filling.


You can of course keep the fire going while you eat if it's cold weather, but if the idea is to quickly cook up a hot meal or purify some water with minimal smoke and heat signature, you'll want to put it out as soon as possible. In that case, keeping your pot on the rock while you eat helps keep your food warm, and you can always sit on the rock afterwards (check to make sure it's not too hot!) for warmth.

And don't forget those three rocks that are down in the bottom under the ashes, very hot by now. They can be fished out and used to help keep you warm, or even used for additional cooking (dropped into water to heat it,) maximizing the use you get out of this one small, quick fire.